Introduction
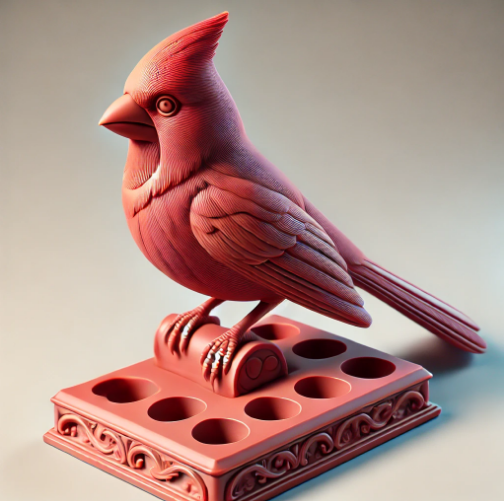
With countless opportunities for invention and customizing, 3D printing has transformed the way we produce both practical and decorative items. One such creative and practical endeavor is the 3D print cardinal pen holder. This well-crafted addition not only keeps your writing tools orderly but also gives your workstation some grace.
This all-inclusive guide will go over the advantages of 3D printing a cardinal pen holder, the best materials and settings for optimum results, detailed instructions, and fixes to typical printing problems. Whether your interests are professional or recreational, this guide will enable you to effectively print a gorgeous and useful cardinal pen holder.
Why 3D Print a Cardinal Pen Holder?
1. Original and Beautiful Architecture
Any workstation would look great with a visually arresting pen holder with cardinals. Both professionals and creatives would find the cardinal to be a great choice because of its symbolic meaning—that of vigor and inspiration.
2. Economical and Customizable
Custom pen holders created using 3D printing can be had at a fraction of the price of bought ones. Its dimensions, form, or detailing can be changed to fit your particular demand.
3. Useful and Space- Saving
Designed to store several pens, markers, or pencils, a cardinal pen holder keeps your desk orderly and accentuates your workstation with decoration.
4. Fantastic for Personal Projects and Gifts
Offering a mix of function and appeal, this design makes the ideal gift for office workers, students, or bird enthusiasts.
Ideal materials for 3D printing a cardinal pen holder
A good print depends on the correct filament choice. The ideal materials for printing your cardinal pen holder are these:
- 1. PLA (polylactic acid)
- Cons: Less durable than other materials, can become brittle over time.
2. PETG (Polyethylene Terephthalate Glycol)
- Pros: Strong, water-resistant, durable.
- Cons: Requires precise print settings for best results.
3. ABS (Acrylonitrile Butadiene Styrene)
- Pros: High durability, impact-resistant, heat-resistant.
- Cons: Prone to warping, requires a well-ventilated area for printing.
4. Resin (For SLA Printers)
- Pros: Excellent detail, smooth finish, ideal for intricate designs.
- Cons: Requires post-processing and UV curing, higher material cost.
Recommended Print Settings for a Cardinal Pen Holder
To achieve the best print quality, follow these recommended settings:
- Layer Height: 0.1 – 0.2 mm (for fine details)
- Print Speed: 40-60 mm/s
- Infill Density: 15-30% (for a balance of strength and material efficiency)
- Wall Thickness: 2-3 mm
- Nozzle Temperature:
- PLA: 190-220°C
- PETG: 220-250°C
- ABS: 230-250°C
- Bed Temperature:
- PLA: 50-60°C
- PETG: 70-90°C
- ABS: 90-110°C
- Cooling Fan:
- PLA: 100%
- PETG & ABS: 50% or lower to prevent warping
Step-by-Step Guide to 3D Printing a Cardinal Pen Holder
Step 1: Find or Design a 3D Model
You can download a cardinal pen holder STL file from platforms like Thingiverse, MyMiniFactory, or Cults3D. Alternatively, you can design your own using 3D modeling software like Blender, Tinkercad, or Fusion 360.
Step 2: Prepare Your 3D Printer and Filament
- Load the chosen filament into the printer.
- Level the bed to ensure proper adhesion.
- Clean the print surface for better adhesion.
Step 3: Slice the Model
- Use slicing software like Cura or PrusaSlicer to generate the G-code.
- Set appropriate print settings for material and design complexity.
- Enable support if needed for overhangs.
Step 4: Start the Print
- Monitor the first few layers to ensure proper adhesion.
- If needed, adjust the settings mid-print for optimal results.
Step 5: Post-Processing and Finishing
- Remove supports carefully using pliers or a knife.
- Sand any rough edges for a smoother finish.
- Optionally, paint or coat the model for an enhanced look.
Common Issues and Troubleshooting
1. Use a heated bed, glue stick, or painter’s tape, and make sure the bed is level.
2. Stringing or Oozing Solution, In the slicing program, lower the nozzle temperature and activate retraction settings.
Solution for weak structure or layer separation: raise wall thickness and infill density to guarantee appropriate extrusion settings.
3. For the extruder, lower the extrusion multiplier and calibrate steps per mm using blobby prints.
READ MORE – Bullet Camera Holder 3D Print: A Complete Guide to Custom Mounting Solutions
FAQs:
1. Where can I find a free STL file for a cardinal pen holder?
You can find free STL files on Thingiverse, MyMiniFactory, and Printables.com.
2. What is the best filament for a durable pen holder?
PETG and ABS are the best options for durability and strength.
3. How long does it take to 3D print a cardinal pen holder?
Depending on size and print settings, it can take 4-10 hours.
4. Can I resize the model to hold more pens?
Yes, you can scale the model in your slicing software before printing.
5. How do I improve the print quality of intricate details?
Use a 0.1 mm layer height, slower print speed, and a fine-tuned cooling system for best results.
Conclusion:
An interesting and useful project that gives your workstation structure and inventiveness is a cardinal pen holder 3D print. Following the correct materials, print settings, and troubleshooting methods will help you to produce a sturdy and attractive pen holder. This project highlights 3D printing and customizing’s attractiveness for either personal use or as a gift.


